Lands gets its name from the entire deck being based around lands. Land tutors, assembling land combos, using lands to disrupt the opponent, ramping with lands, and even generating card advantage with lands from one of the more important cards, [[Life from the Loam]]. Ultimately, it wins by trying using [[Thespian’s Stage]] to make a copy of [[Dark Depths]], and that creates a copy with no ice counters to immediately make a 20/20 [[Marit Lage Token]]. Lands is a deck that’s been around Legacy for a long time, but it recently got some new cards in [[Urza’s Saga]], [[Force of Vigor]], and [[Endurance]]. With these changes, it’s important for all Legacy players to be prepared for Lands.
How does Lands matchup against TES?
[[Dark Depths]], [[Thespian’s Stage]] – Lands used to have a reputation of winning slowly, but since the printing of [[Thespian’s Stage]], they can now win quickly and has the ability to race other decks. With all of the land tutors and [[Life from the Loam]] Lands can assemble this combo consistently.
[[Wasteland]] – Game one, [[Wasteland]] is Lands only way to interact with us in a meaningful way. TES doesn’t play any basic lands, so sometimes that can be good enough to slow us down several turns. Pairing this with a [[Life from the Loam]] can lock us out of the game.
[[Sphere of Resistance]] – Coming from the sideboard, [[Sphere of Resistance]] helps Lands a lot against any combo deck and especially Storm decks. It makes comboing off nearly impossible, and at a minimum will slow TES down in order to answer it. The fact [[Sphere of Resistance]] exists in their sideboard forces us to bring in permanent removal that we wouldn’t need in this matchup otherwise.
[[Force of Vigor]], [[Urza’s Saga]] – These cards are newer to Lands since the last time we reviewed this matchup. [[Force of Vigor]] is the main concern for TES because there are many artifacts that we use for tutors and mana. It is an instant, so if we sequence our combo in a way that can expose our artifacts to a [[Force of Vigor]] at the wrong time we could lose mid-combo or if we have to pass the turn with artifacts in play, it could cost us the game.
Deck List
Main Deck
- 4 [[Burning Wish]]
- 4 [[Wishclaw Talisman]]
- 4 [[Brainstorm]]
- 4 [[Ponder]]
- 1 [[Ad Nauseam]]
- 1 [[Echo of Eons]]
- 1 [[Tendrils of Agony]]
- 4 [[Veil of Summer]]
- 2 [[Orim’s Chant]]
- 4 [[Rite of Flame]]
- 4 [[Dark Ritual]]
- 4 [[Lion’s Eye Diamond]]
- 4 [[Lotus Petal]]
- 3 [[Chrome Mox]]
- 3 [[Mox Opal]]
- 3 [[Verdant Catacombs]]
- 2 [[Scalding Tarn]]
- 2 [[Polluted Delta]]
- 1 [[Tropical Island]]
- 1 [[Badlands]]
- 1 [[Underground Sea]]
- 1 [[Scrubland]]
- 1 [[Taiga]]
- 1 [[Tundra]]
Sideboard
- 4 [[Galvanic Relay]]
- 2 [[Abrupt Decay]]
- 3 [[Prismatic Ending]]
- 1 [[Grapeshot]]
- 1 [[Empty the Warrens]]
- 1 [[Tendrils of Agony]]
- 1 [[Echo of Eons]]
- 1 [[Peer into the Abyss]]
- 1 [[Massacre]]
Ways to Win This Matchup
Our Game Plan This is a matchup where we can usually afford to take a few extra turns. The opponent can’t win quickly with most hands and their disruption is light. If they [[Wasteland]] a land, we will usually have the time to recover or rely on artifact mana and a land for turn to combo. The biggest reason I’ve seen TES players lose to Lands is due to the hands that are kept and not drawing out of it. An example is keeping a hand with all lands, rituals, and artifact mana and then losing because you never find a tutor effect. Additionally, they could play a [[Sphere of Resistance]] and then need a tutor effect and a way to answer [[Sphere of Resistance]] and never getting there. Focusing on hands that can win quickly, win through a turn one [[Wasteland]], or don’t need very specific cards to be drawn is key to winning this matchup. If you’re going to keep a hand that needs an additional card in order to win, do the math and you can usually give yourself 2-3 draws to get there.
Sideboarding
-4 [[Veil of Summer]], -1 [[Orim’s Chant]], +2 [[Abrupt Decay]], +3 [[Prismatic Ending]]
In post-board games, we have to worry about our Lands opponent bringing in cards like [[Pyroblast]], [[Force of Vigor]], and [[Sphere of Resistance]]. We bring in [[Abrupt Decay]] and [[Prismatic Ending]] to answer [[Sphere of Resistance]]. There’s a trick to remove [[Sphere of Resistance]] with [[Prismatic Ending]] for two mana. You announce the spell for one mana, and pay the tax with a second color. Now the spell meets the requirements to be cast while also meeting the color requirements to exile it.
Game Play
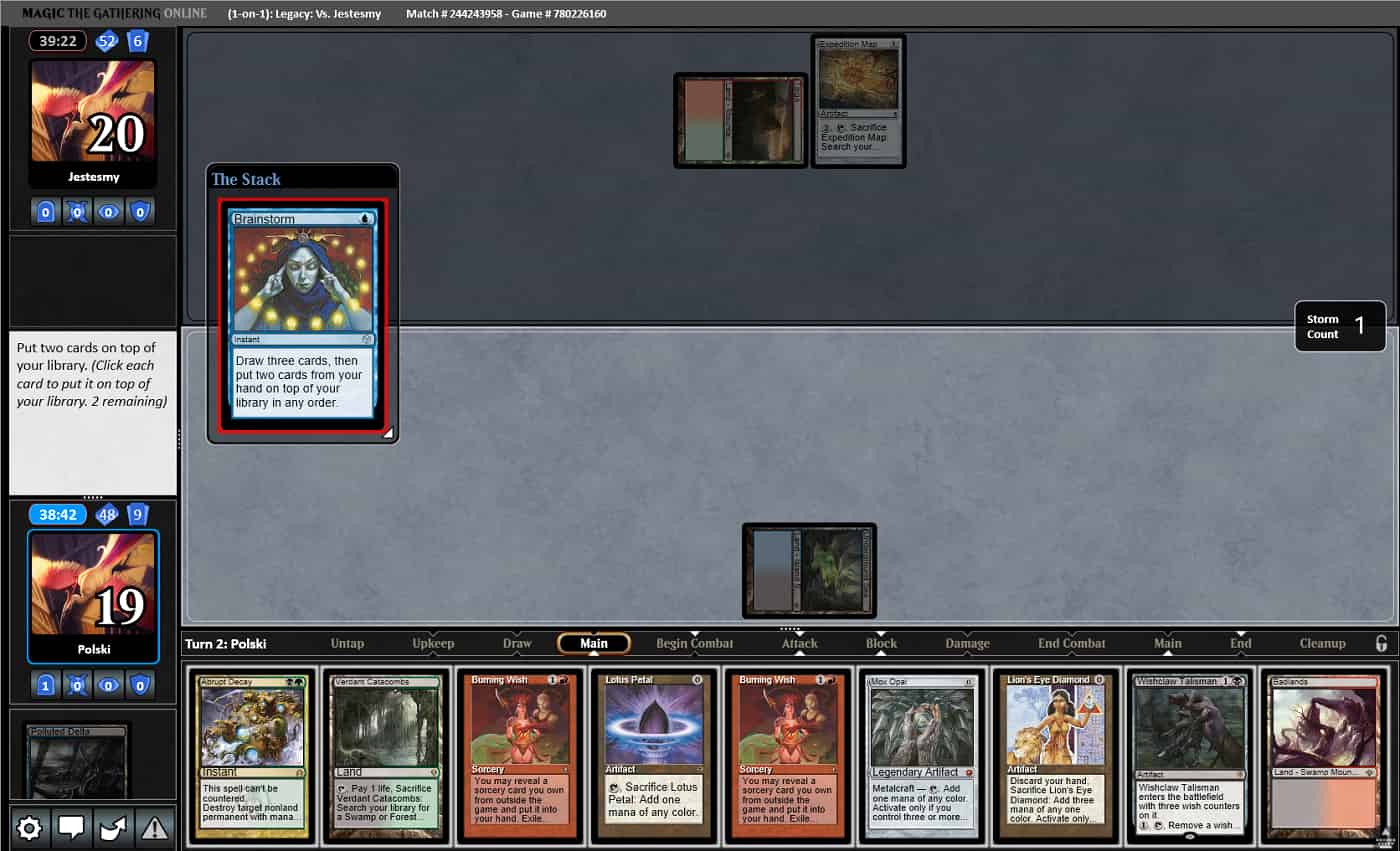
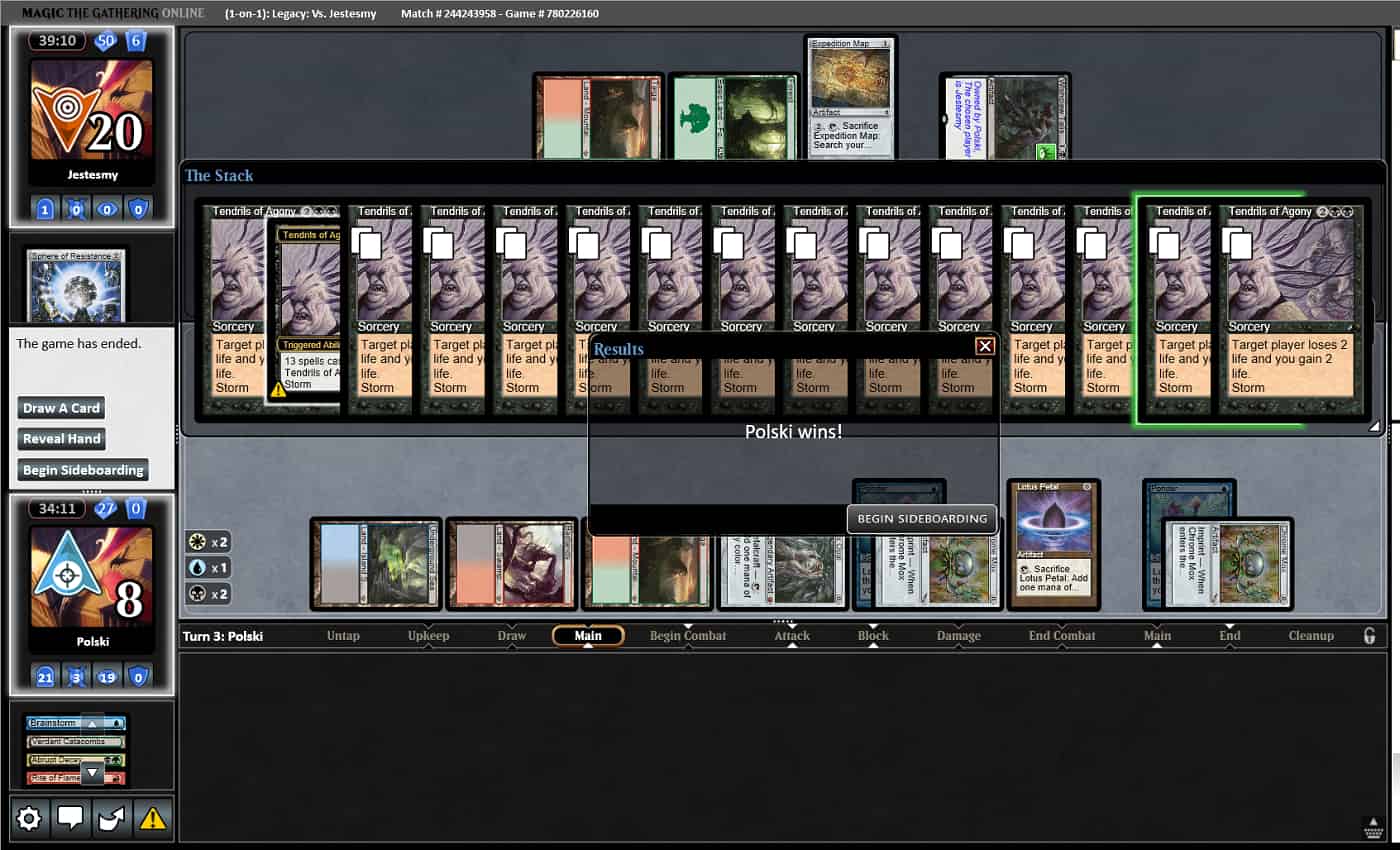
For this game, I was on the play and we both kept our opening seven cards. My hand as a bit slow, but it had mana, [[Burning Wish]], [[Abrupt Decay]], and [[Brainstorm]]. I was on the play, and just played a [[Polluted Delta]] and passed the turn. My opponent spent their first turn playing a land and an [[Expedition Map]]. On my second turn, I cast the [[Brainstorm]] looking for a fast way to combo in case of a second turn [[Sphere of Resistance]]. If I couldn’t find a combo off the [[Brainstorm]], I had an additional fetch land to shuffle the unwanted cards. With the [[Mox Opal]] for the draw step and the [[Lion’s Eye Diamond]] off the [[Brainstorm]], that would give me enough mana to [[Burning Wish]] into [[Echo of Eons]].

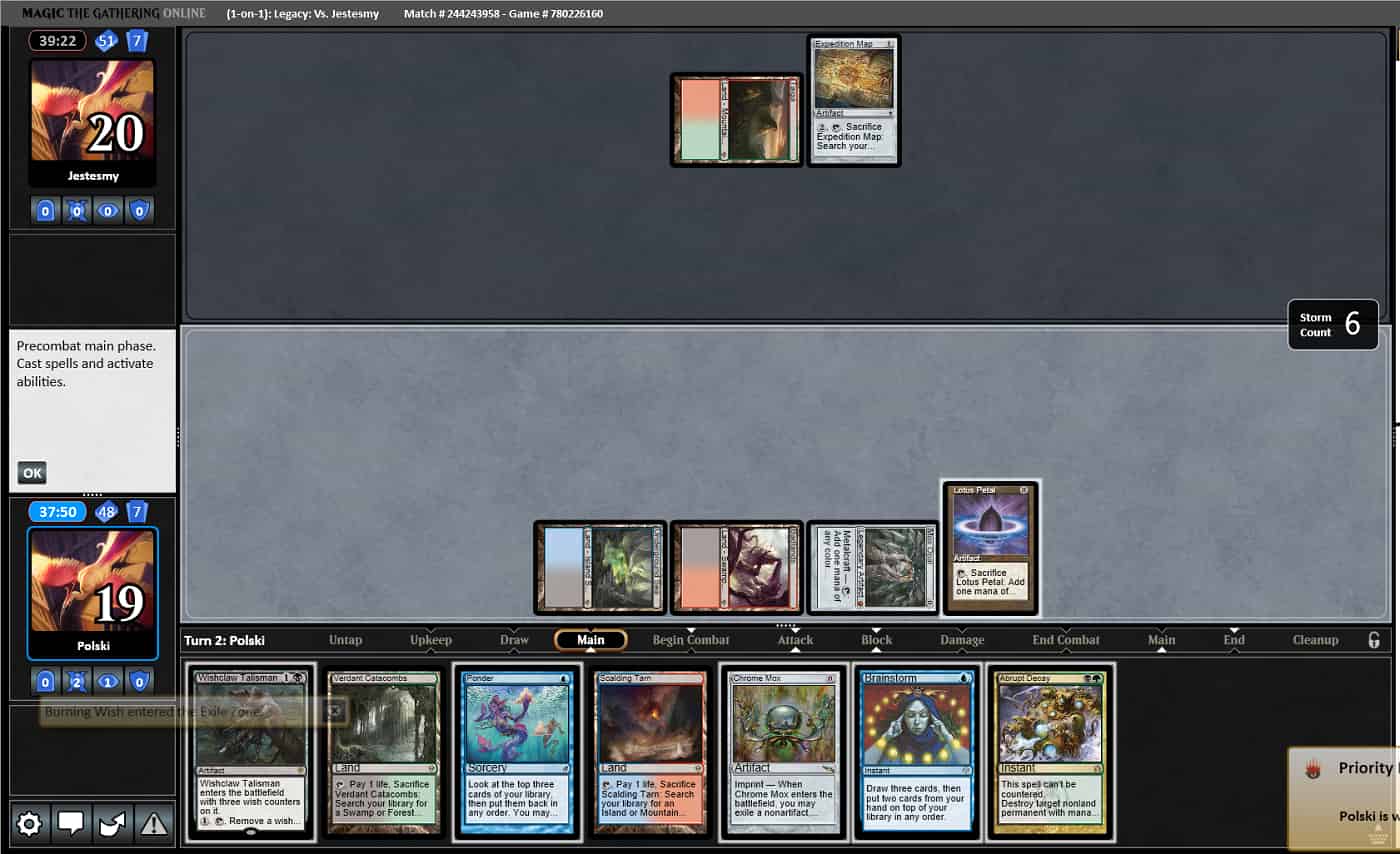
[[Echo of Eons]] gave me a decent seven cards, but not good enough to continue comboing on its own. I had to use the [[Brainstorm]] to give me the most cards to try and continue this turn, so I played the [[Chrome Mox]] and imprinted [[Ponder]] to cast it.

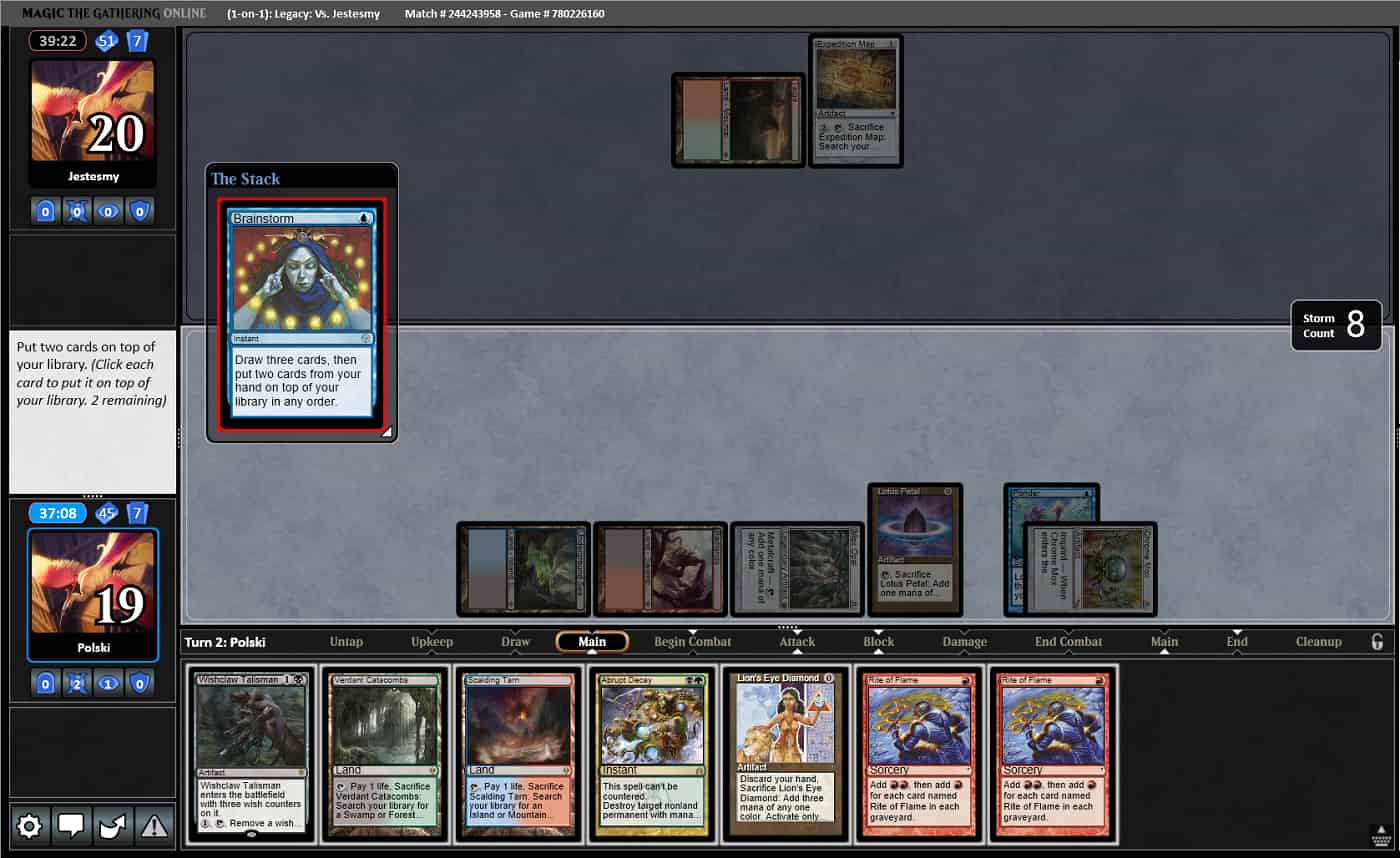
[[Brainstorm]] drew three really good cards, but with only a [[Lotus Petal]], I couldn’t cast the [[Rite of Flame]] and have access to black mana for [[Wishclaw Talisman]]. I just had to put back a land and the [[Abrupt Decay]] on the top of my deck and pass the turn.

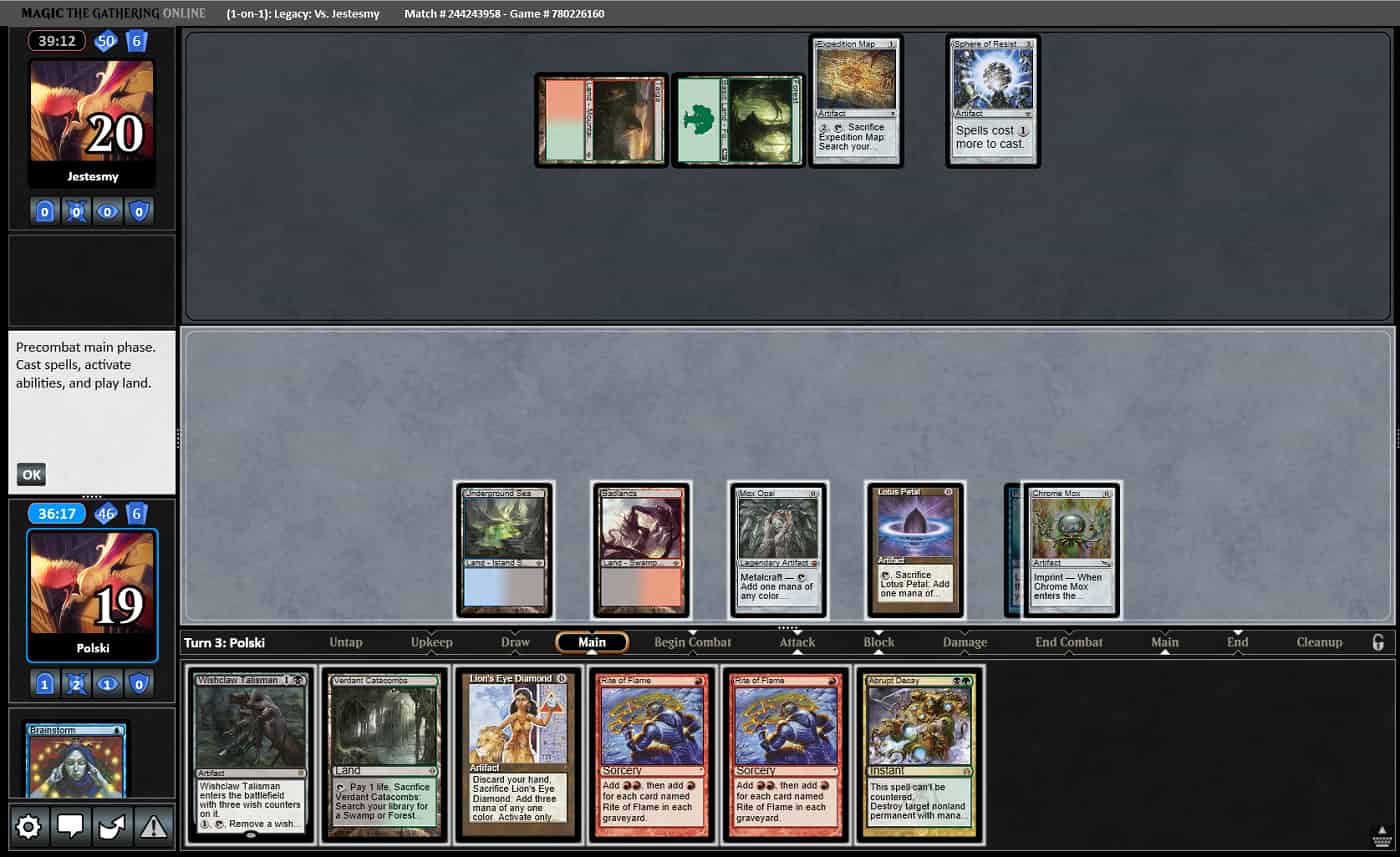
My opponent spent their second turn playing a [[Sphere of Resistance]]. Thankfully, I kept the [[Abrupt Decay]] on the top of my deck and drew it for my turn.

From there, I was able to play and sacrifice the [[Verdant Catacombs]] for a green source in [[Taiga]]. Having access to six mana from my lands and artifacts in play, I used three of them to cast [[Abrupt Decay]] on the [[Sphere of Resistance]]. Then, I was able to make an additional three mana from two copies of [[Rite of Flame]] to play [[Wishclaw Talisman]], leaving me with four mana. I could then sacrifice the [[Lion’s Eye Diamond]] to put me up to seven mana. From there, I could activate [[Wishclaw Talisman]] to get and cast [[Ad Nauseam]] with one mana floating. Having 20 life, it was easy to win from there.

This matchup can have very lopsided games, and is usually in favor of TES, which is what we saw in this example game. If we can win on the first or second turn especially on the play, Lands doesn’t have much of a chance. It’s when we keep a slower hand, lose to an immediate [[Wasteland]], or to a turn-two [[Sphere of Resistance]] that we can struggle. When a deck is named Lands, we can expect very little interaction and attacking our lands isn’t as strong compared to other decks because of how many rituals and artifact mana we have. If we lose to a [[Marit Lage Token]] with no other disruption, it probably means we kept a hand that just couldn’t put together a combo. While this example game doesn’t show the true power of Lands, this isn’t really a matchup that will. Lands tends to dominate against fair decks, and TES is not one of those. I hope you enjoyed this article, can take some of the lessons learned, and apply them to your own playtesting.